Quickstart
Get Up and Running with PairSpaces
What We'll Do
This is a rapid onboarding guide to PairSpaces. You will create a Space, access the Space, and work with someone from your Space.
You will use the free Starter Tier and not be charged for any services used. The Starter Tier limits the number of Spaces you can create to one and the time you can use your Spaces to 10 hours per month.
Setting Up
Signing Up
Visit https://pairspaces.com/auth/signup and choose a way to create a PairSpaces account.
or
If you choose to Sign Up with Email a one-time password (OTP) will be sent to your email address. Enter the OTP when prompted.
Confirm your email
We sent a code to your email address
Teams
To work together with someone you invite someone to your Space.
Create a Team
Select the Members menu item under Manage.
No Team.
Add team members to collaborate in your Spaces.
Click Add Members and enter the email address of someone you want to work with. For Role, select Member.
PairSpaces will email your team member a link to set up their account.
Watch a video of the steps together.
Spaces
Create a Space
When you first access PairSpaces, you will have no Spaces.
No Local Spaces.
Create a Space to work with your team.
To create a Space, click Create Your Space.
From the Space Configuration tab, enter a name for your Space and select a team member to share the Space with.
A Local Space is created immediately.
You have one Local Space.
Local Spaces
| Name | Status | |
|---|---|---|
dynamic-stark | Stopped |
Watch a video of the steps together.
Work Together
Let's get you and your team working together from your Space.
What You Do
Download the PairSpaces CLI. Choose the version of the PairSpaces CLI for your operating system below.
> curl -fsSL https://raw.githubusercontent.com/pairspaces/install/main/install.sh | sudo bash
> curl -fsSL https://raw.githubusercontent.com/pairspaces/install/main/install.sh | sudo bash
# PowerShell
> $installerUrl = "https://raw.githubusercontent.com/pairspaces/install/main/install.bat"
> $installerPath = "$env:USERPROFILE\Downloads\install_pair.bat"
> Invoke-WebRequest -Uri $installerUrl -OutFile $installerPath
> & $installerPath
> pair version

2.0.0-release (Latest)
> pair version

2.0.0-release (Latest)
> pair.exe version

0.5.4-release (Latest)
From your Terminal app, you can list your Spaces using pair spaces list, but first you will sign in from the PairSpaces CLI.
> pair spaces list

You are signed out. Signing you in...

1. Go to the browser that just opened. If a browser window did not appear, navigate to https://pairspaces.com/device/verify
2. Enter the user code M6R6I9IZ
3. When your session is created, return to this prompt
> pair spaces list

You are signed out. Signing you in...

1. Go to the browser that just opened. If a browser window did not appear, navigate to https://pairspaces.com/device/verify
2. Enter the user code M6R6I9IZ
3. When your session is created, return to this prompt
> pair.exe spaces list

You are signed out. Signing you in...

1. Go to the browser that just opened. If a browser window did not appear, navigate to https://pairspaces.com/device/verify
2. Enter the user code M6R6I9IZ
3. When your session is created, return to this prompt
And then you will see the Spaces you created.
> pair spaces list

Space ID			        Name				        Type
-------------------------	-------------------------	----------------
68704fdcf60bbb90e2b801f3	dynamic-stark			    Local
-------------------------	-------------------------	----------------
> pair spaces list

Space ID			        Name				        Type
-------------------------	-------------------------	----------------
68704fdcf60bbb90e2b801f3	dynamic-stark			    Local
-------------------------	-------------------------	----------------
> pair.exe spaces list

Space ID			        Name				        Type
-------------------------	-------------------------	----------------
68704fdcf60bbb90e2b801f3	dynamic-stark			    Local
-------------------------	-------------------------	----------------
Before you can access your Space you need a public/private keypair. Create Keys using pair keys create.
> pair keys create

Your Keys were created successfully.
> pair keys create

Your Keys were created successfully.
> pair.exe keys create

Your Keys were created successfully.
And now start your Space using pair spaces connect SPACE_ID, where SPACE_ID is the unique identifier for your Space (it's the value for Space ID in the output from pair spaces list).
Local Spaces require Docker to be running. When you run the command, the PairSpaces CLI checks if Docker is running.
> pair spaces connect 677029e3e72826e42fe49fcb

Docker is not running. Please start Docker and try connecting to your Space.
> pair spaces connect 677029e3e72826e42fe49fcb

Docker is not running. Please start Docker and try connecting to your Space.
> pair.exe spaces connect 677029e3e72826e42fe49fcb

Docker is not running. Please start Docker and try connecting to your Space.
If Docker is already running you will see the following output.
> pair spaces connect 677029e3e72826e42fe49fcb
Unable to find image 'pairspaces/local-space-image:build' locally
build: Pulling from pairspaces/local-space-image
6e21e851fdce: Pull complete
ddb0fbac1c67: Pull complete
2956c16b0edc: Pull complete
ded3d3b8cd56: Pull complete
76a4c7a40933: Pull complete
ef2acd22239e: Pull complete
Digest: sha256:598d22383175833ce15e198c88c3be3244c7bbd7ce41c88092191df0adf186a0
Status: Downloaded newer image for pairspaces/local-space-image:build

Your team can connect to your Space now. Use Ctrl-C to close the connection.
> pair.exe spaces connect 677029e3e72826e42fe49fcb
Unable to find image 'pairspaces/local-space-image:build' locally
build: Pulling from pairspaces/local-space-image
6e21e851fdce: Pull complete
ddb0fbac1c67: Pull complete
2956c16b0edc: Pull complete
ded3d3b8cd56: Pull complete
76a4c7a40933: Pull complete
ef2acd22239e: Pull complete
Digest: sha256:598d22383175833ce15e198c88c3be3244c7bbd7ce41c88092191df0adf186a0
Status: Downloaded newer image for pairspaces/local-space-image:build

Your team can connect to your Space now. Use Ctrl-C to close the connection.
The PairSpaces CLI downloads a publicly-available Docker image from DockerHub. The running container is your Local Space and shares a volume between your current directory and /space in the container.
What Your Team Does
Your team follows the same steps as above, but when they run pair spaces list they see your Local Space as shared with them.
> pair spaces list

Space ID			        Name				        Type
-------------------------	-------------------------	----------------
68704fdcf60bbb90e2b801f3	dynamic-stark (*)			Local
-------------------------	-------------------------	----------------

* Spaces shared with you
> pair spaces list

Space ID			        Name				        Type
-------------------------	-------------------------	----------------
68704fdcf60bbb90e2b801f3	dynamic-stark (*)			Local
-------------------------	-------------------------	----------------

* Spaces shared with you
> pair.exe spaces list

Space ID			        Name				        Type
-------------------------	-------------------------	----------------
68704fdcf60bbb90e2b801f3	dynamic-stark (*)			Local
-------------------------	-------------------------	----------------

* Spaces shared with you
Before your team can access your Space they need a public/private keypair. Create Keys using pair keys create.
> pair keys create

Your Keys were created successfully.
> pair keys create

Your Keys were created successfully.
> pair.exe keys create

Your Keys were created successfully.
Run pair spaces connect SPACE_ID to connect to your Local Space using an end-to-end encrypted network connection.
> pair spaces connect 68704fdcf60bbb90e2b801f3
[root@123abd456] > ls -l
total 12
-rw------- 1 root root 2508 Nov 19  2023 anaconda-ks.cfg
-rw-r--r-- 1 root root  133 Nov 19  2023 anaconda-post.log
-rw------- 1 root root 2068 Nov 19  2023 original-ks.cfg
> pair spaces connect 68704fdcf60bbb90e2b801f3
[root@123abd456] > ls -l
total 12
-rw------- 1 root root 2508 Nov 19  2023 anaconda-ks.cfg
-rw-r--r-- 1 root root  133 Nov 19  2023 anaconda-post.log
-rw------- 1 root root 2068 Nov 19  2023 original-ks.cfg
> pair.exe spaces connect 68704fdcf60bbb90e2b801f3
[root@123abd456] > ls -l
total 12
-rw------- 1 root root 2508 Nov 19  2023 anaconda-ks.cfg
-rw-r--r-- 1 root root  133 Nov 19  2023 anaconda-post.log
-rw------- 1 root root 2068 Nov 19  2023 original-ks.cfg
What's better is to set up an IDE. We're going to use VSCode here, but the steps are similar for other IDEs.
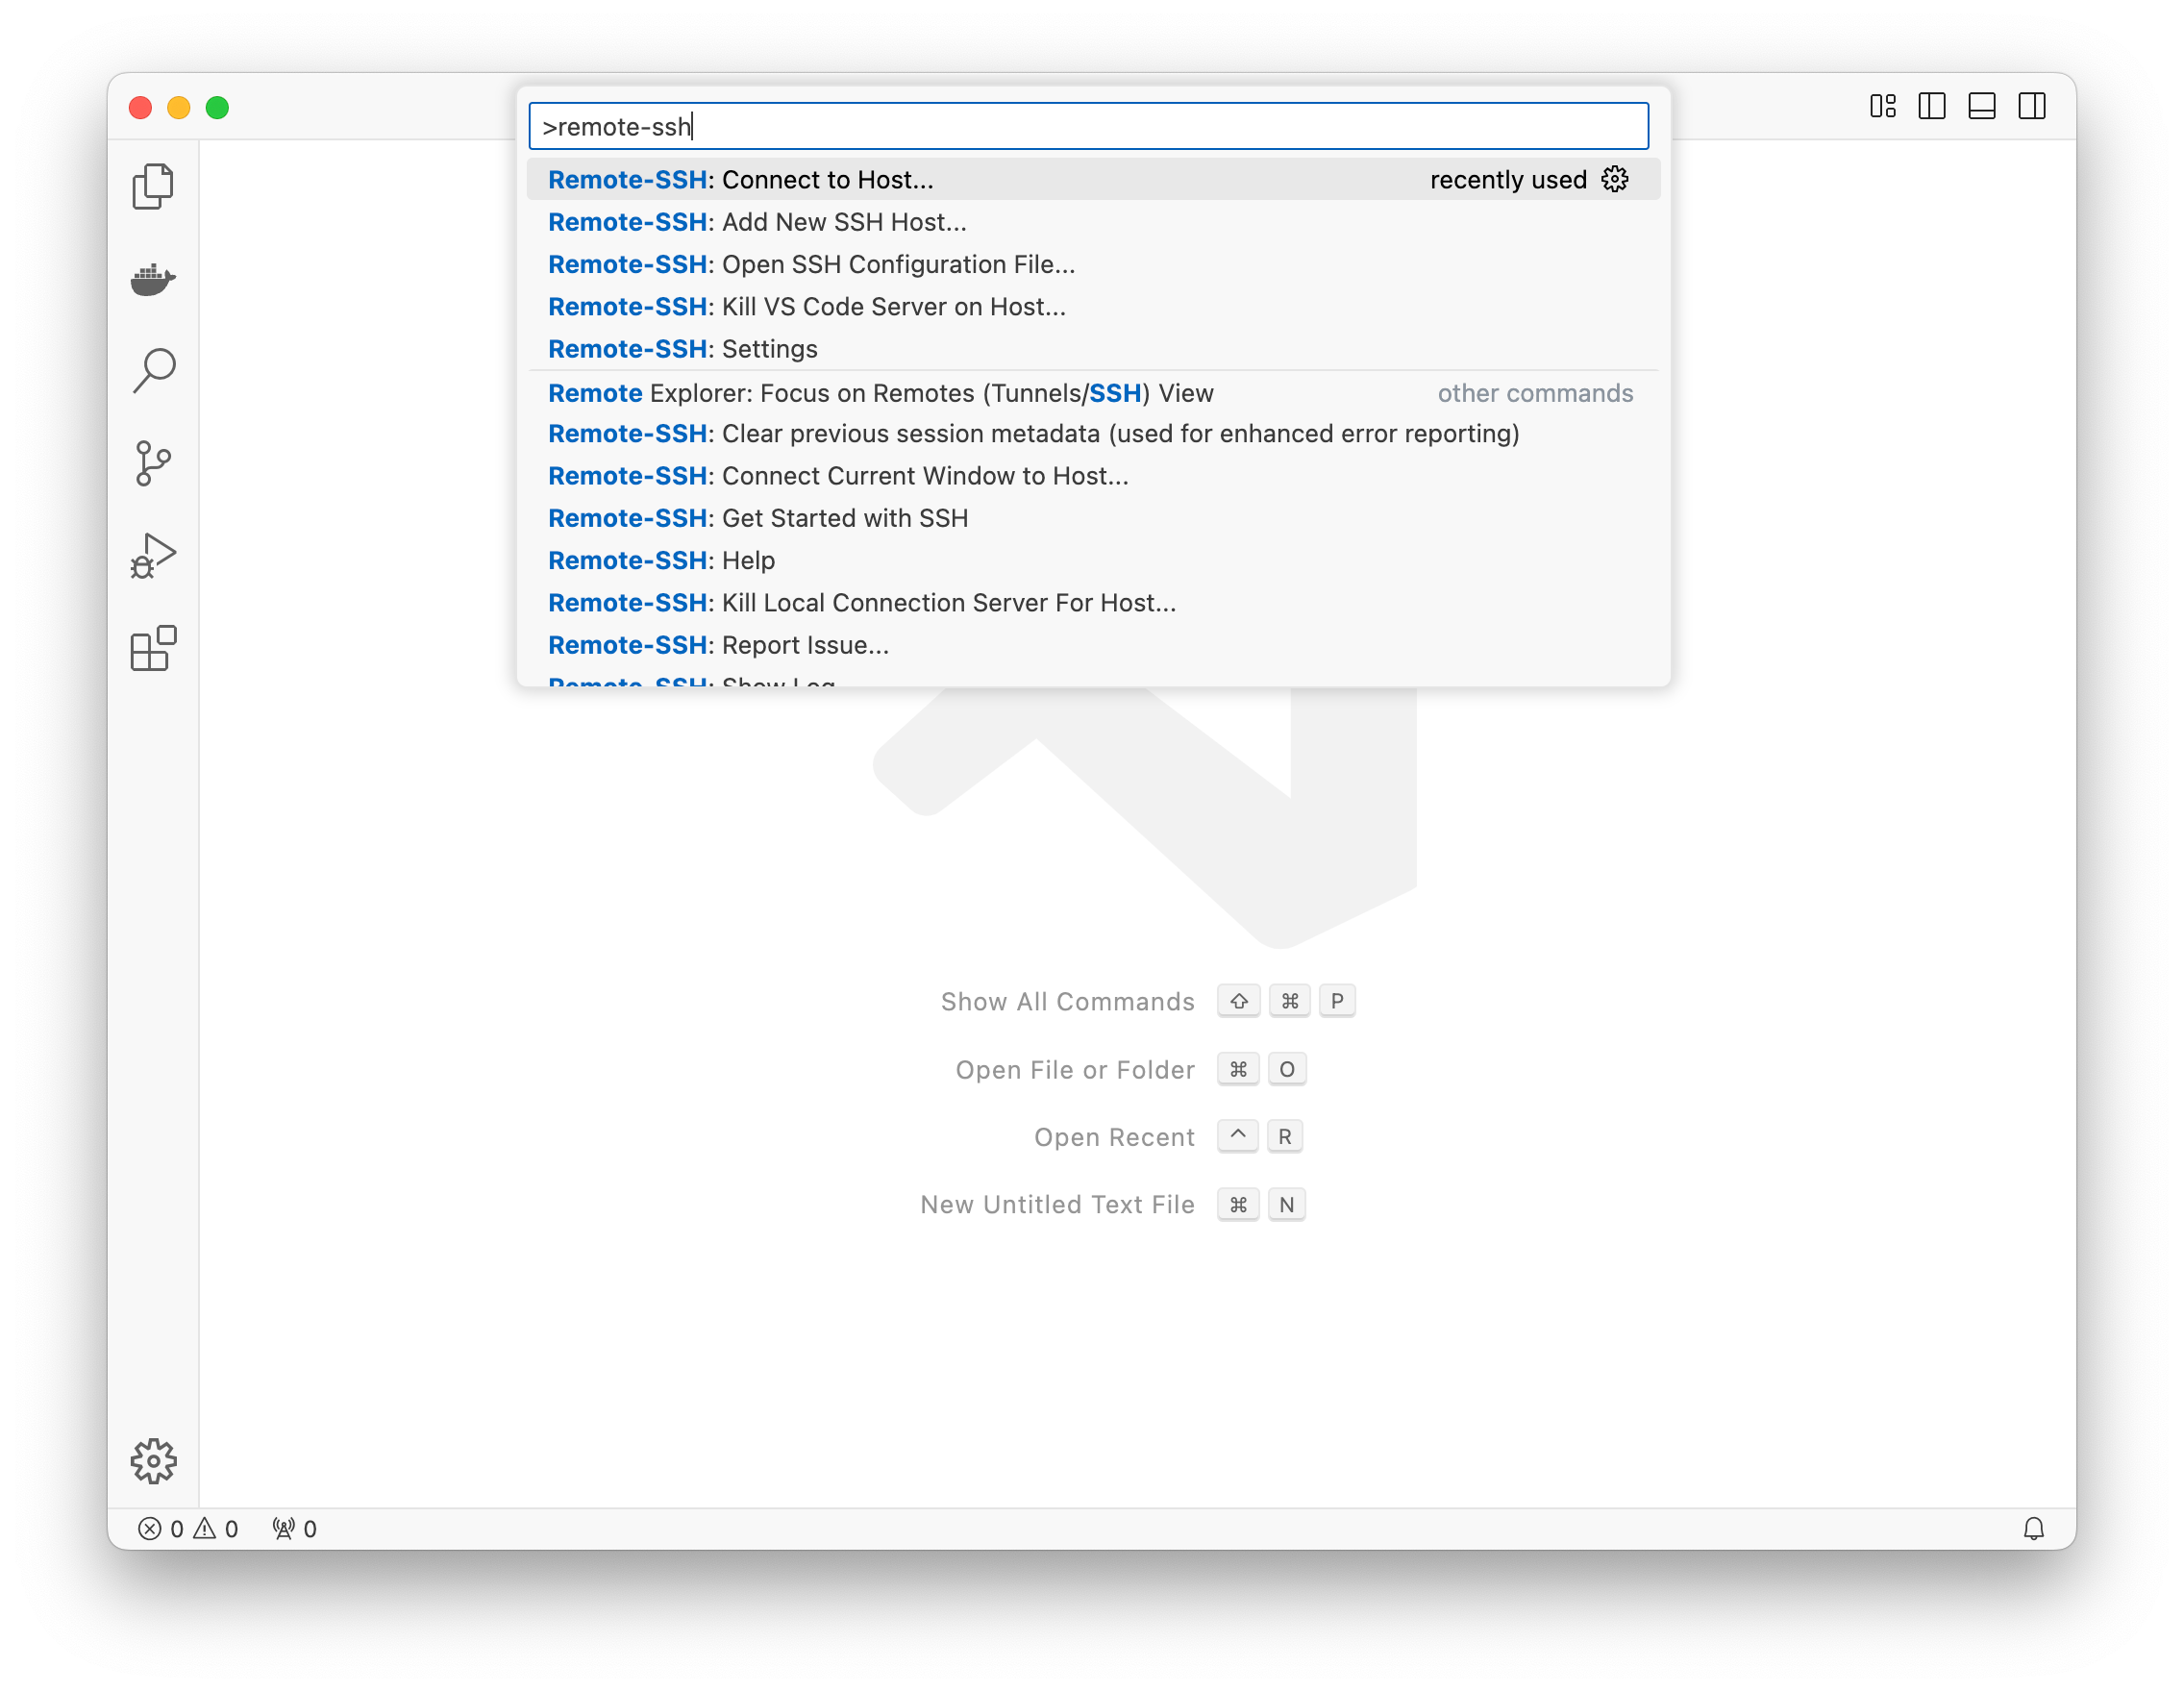
Open VSCode's command panel and click on the command Remote-SSH: Connect to host....

A list of configured SSH profiles will appear. Select the SSH profile identified by your Space ID.
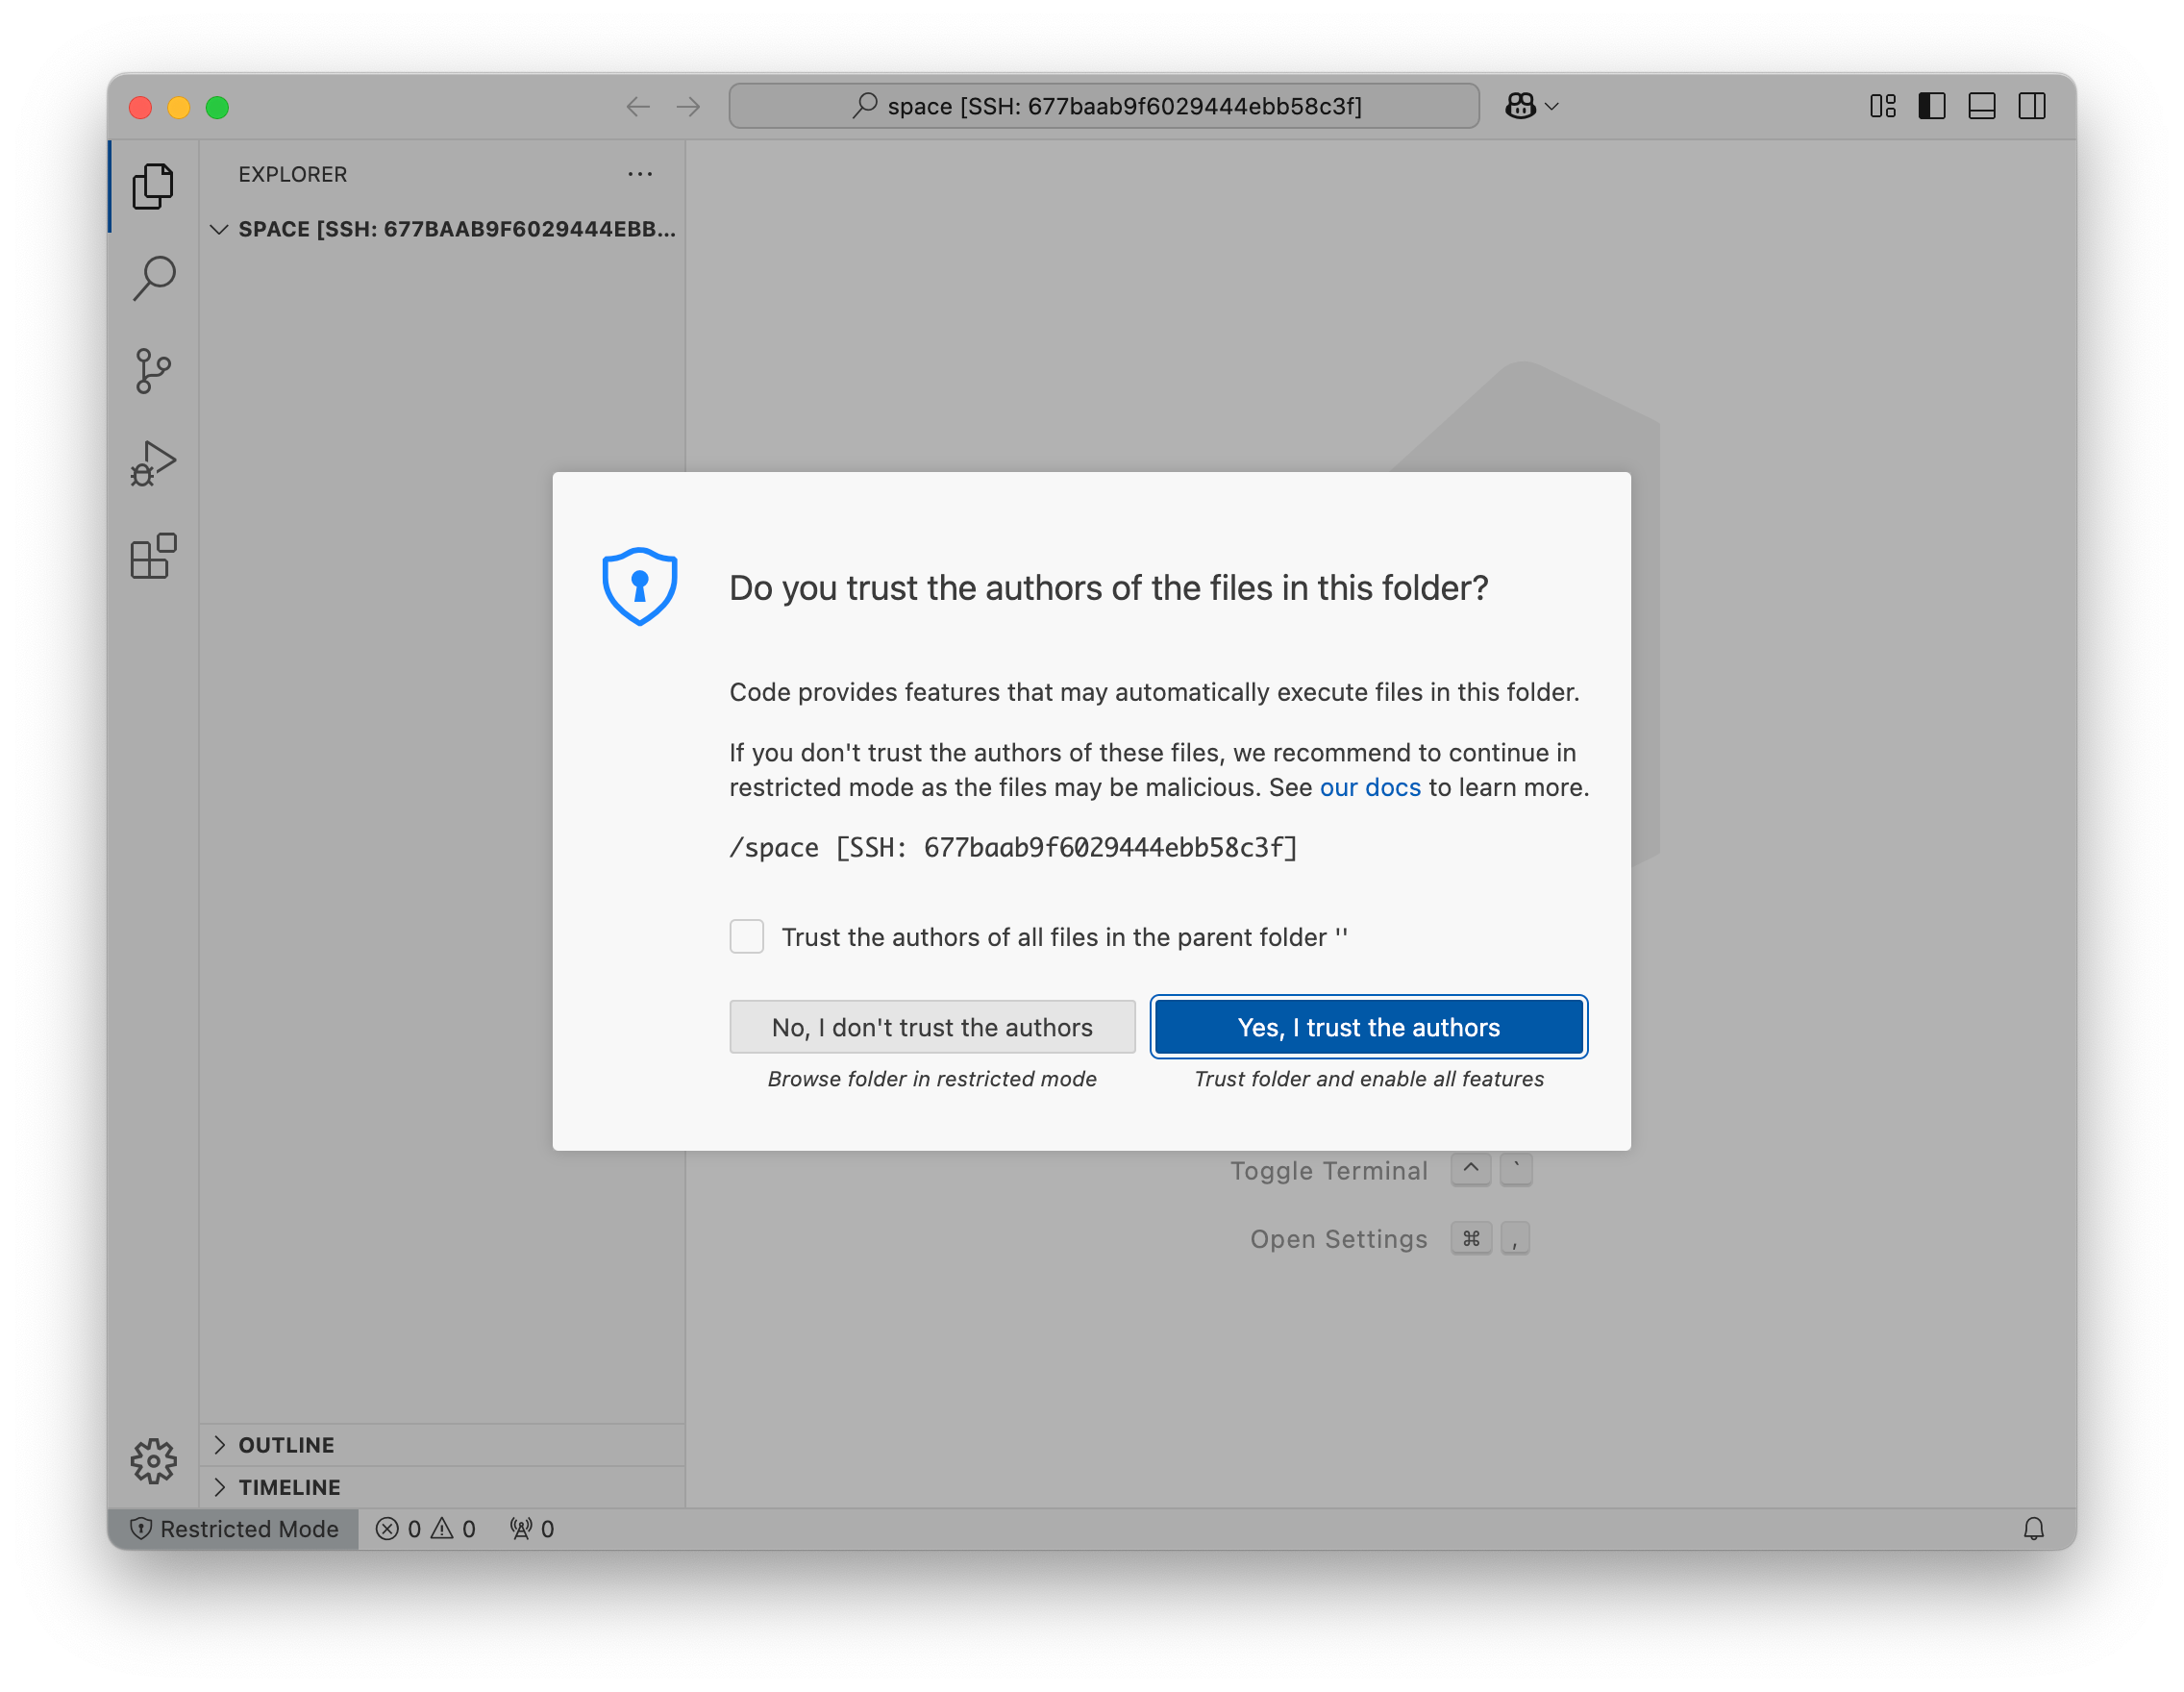
You will see an empty VSCode workspace. Click on Open Folder and navigate to /space. VSCode will prompt you to trust the workspace's folders.

Check the checkbox to trust all files in the parent folder and click Yes, I trust the authors.